3D Printing Parts for my Greenhouse, Round 2
A couple of years ago I wrote about Retaining a Greenhouse Roof with 3D Printing. This is my follow-up to that, with more models I’ve since created for my Greenhouse.
First up though, a quick lesson learnt. Back in 2024 I was just using PLA. This would work fine for a little while, but parts would be in a bad state by the end of the year. The cycles of sun, heat, cold, rain do not fare well with PLA. I’m now just using PETG, which should fare better, but we’ll have to see after a full year.
W Clip Spreader Duo
In my previous post I detailed the original W clip spreader, designed to spread the hold of “W” clips across a wider surface area for a plastic panel (since otherwise these can often just rip into plastic panels, and offer little retention).
When it comes to polycarbonate panels, keeping hold over a larger surface area is key since the panels will flex around such points. Therefore, I created a bigger version of the W clip spreader, that’s wider and much longer, using two W clips:

I’m hoping that just four of these is more than enough for a panel, and that’s something I’m testing right now.
Model and Print Details Here (Model B)
Edge Water Slide Cap
On my greenhouse, rain that falls onto the roof is led into a side gutter, which had an open end. To help collect the water, I designed a little cap which redirects water down a little slide:
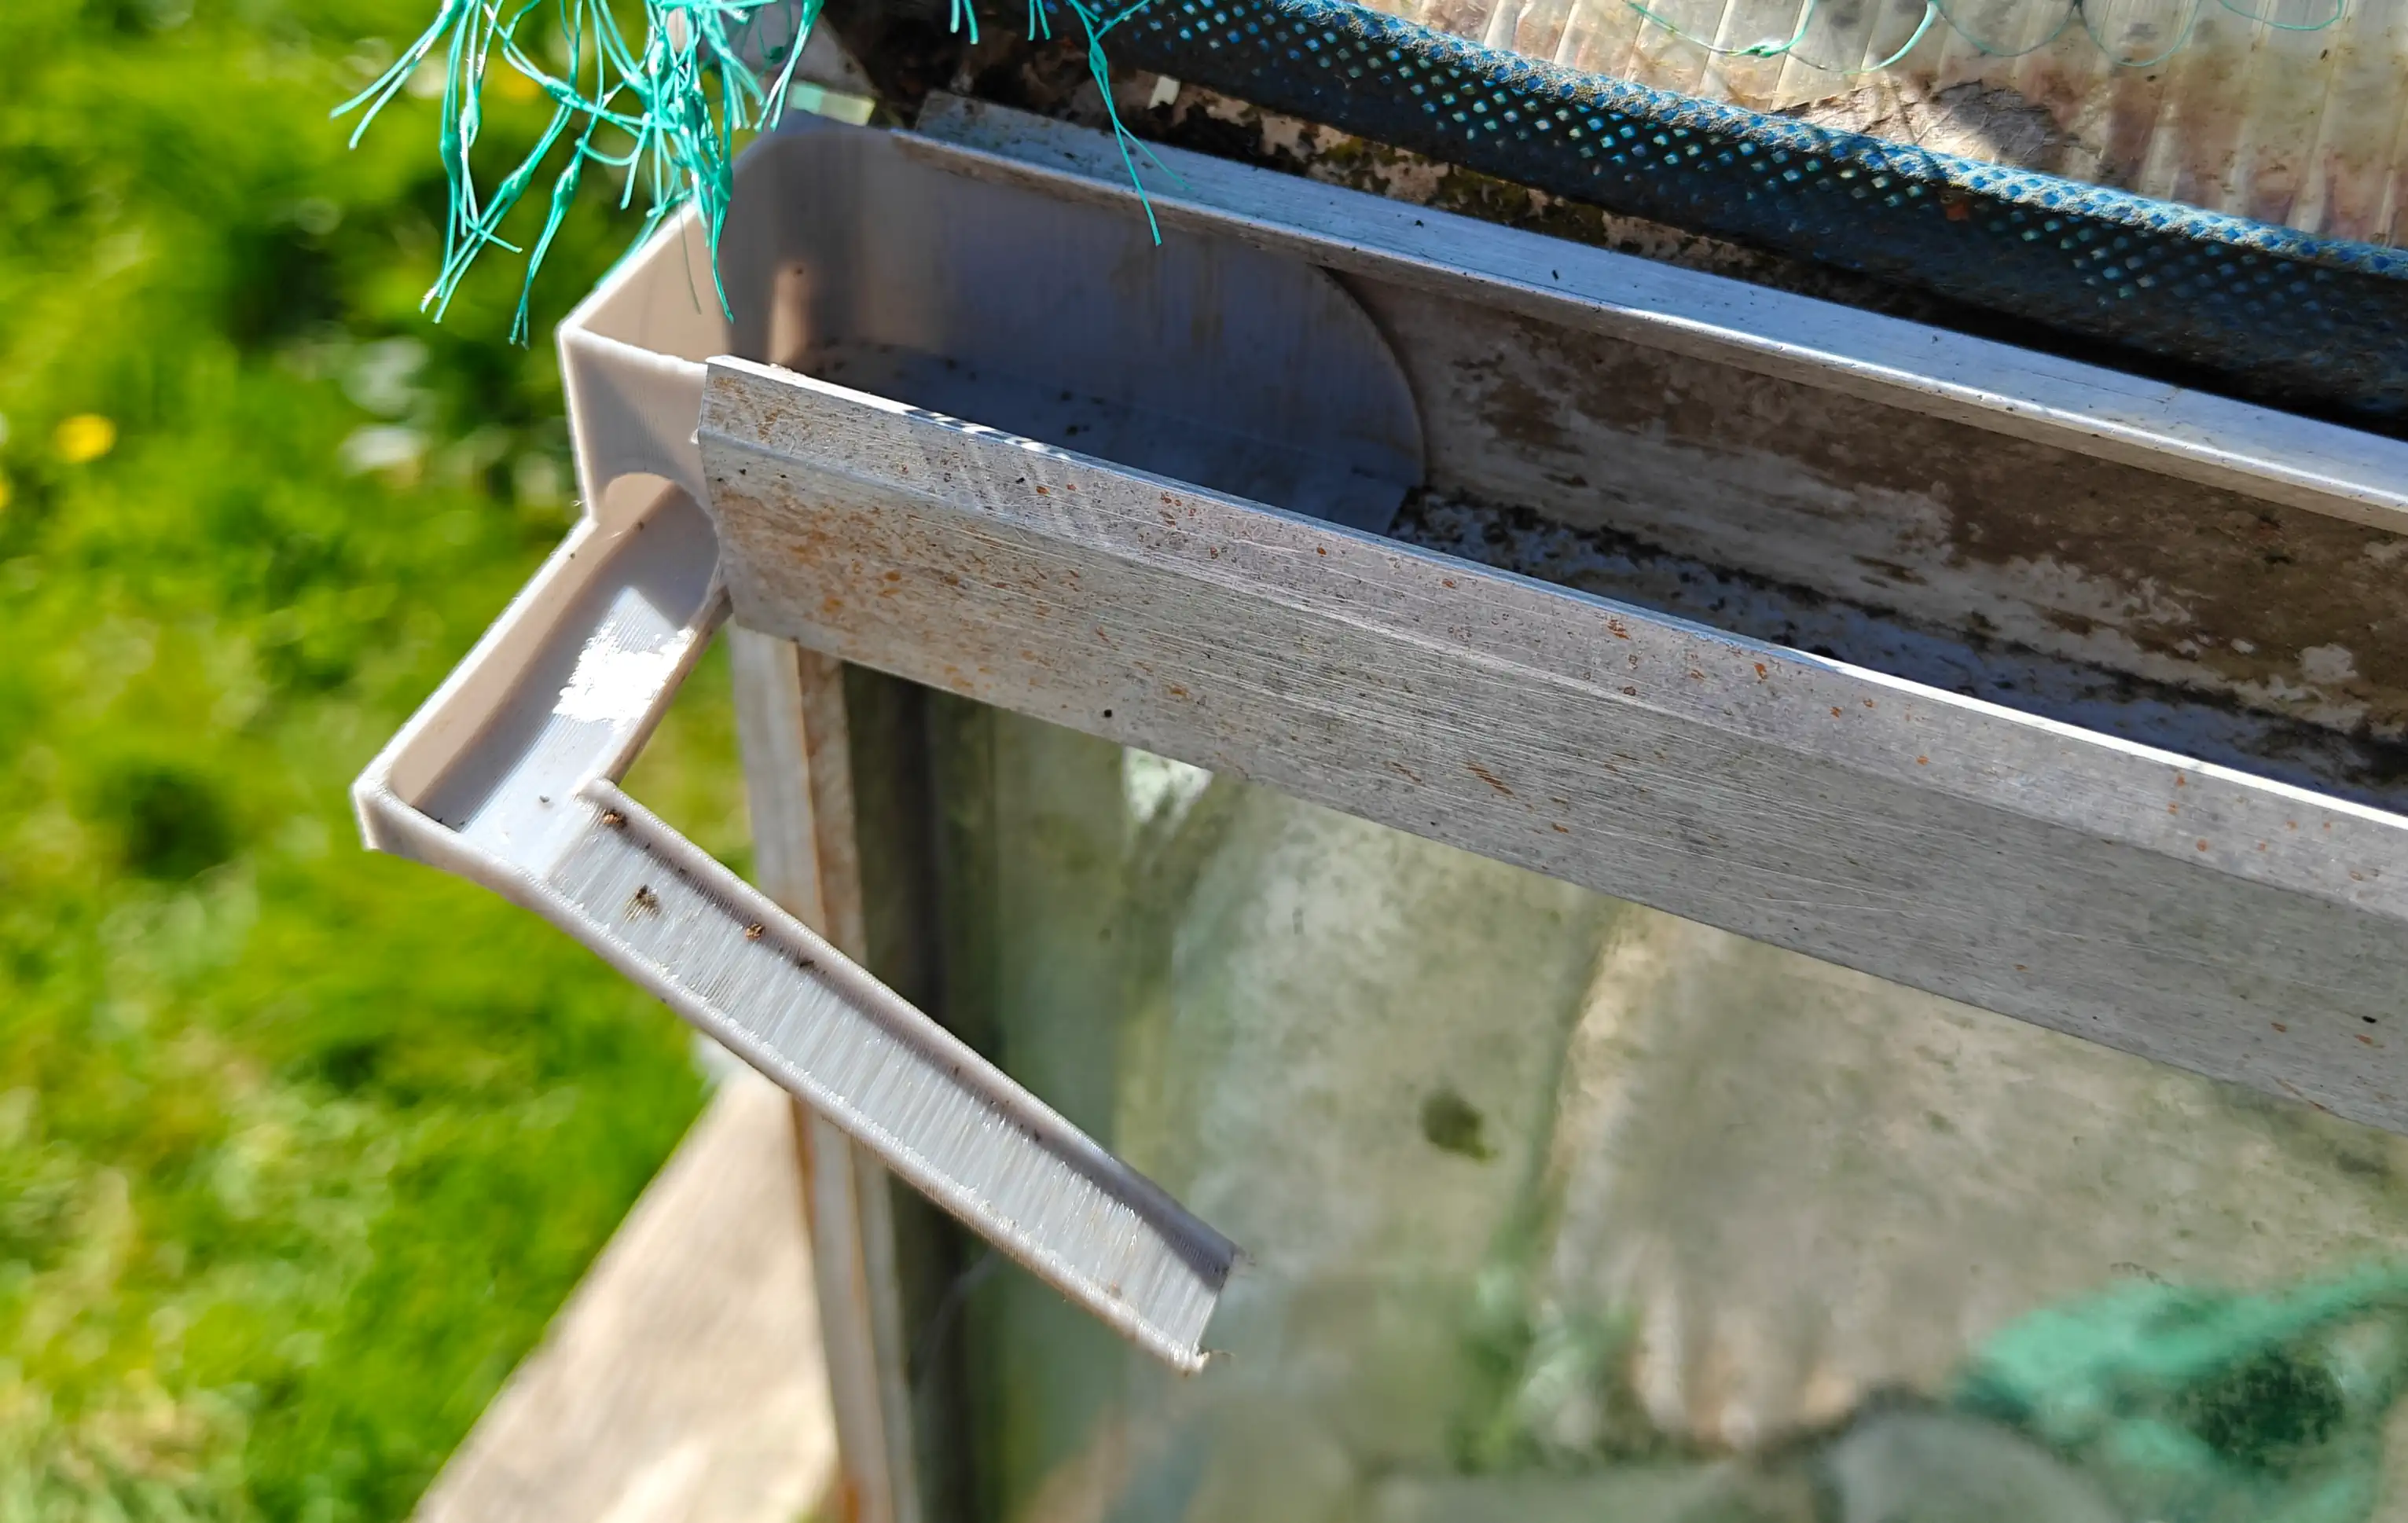
Below this I have a bucket to collect the water. In hindsight, it would be better to instead design this with a straight down hose attachment point, so that a hose could lead into a bucket (like a typical commercial water butt kit), but oh well, I think this is a little more fun.
Model and Print Details Here (Model F)
Big Brace
I had one particular panel which kept breaking loose. To counter this, I created the big brace:
This goes the whole way across the panel to help prevent it bending outwards too far, adding a little more structural rigidity. This is held to the sides via standard W-clips. Due to the size, it requires a larger printer, and even then it would need to be printed in two parts and “welded” together (melted together with a soldering iron).
To be honest, since replacing the problematic panel with a new sheet, and using the “W Clip Spreader Duo” parts with it, I’ve removed this but keep it on hand for any other panels which look problematic.
Model and Print Details Here (Model G)
Door Latch
To ensure my greenhouse door remained closed I would typically put some heavy wood on either side of it. I wanted something better, so designed this latch which holds the door to the greenhouse door frame, hooking in at the frame side then stretching around the door edge.
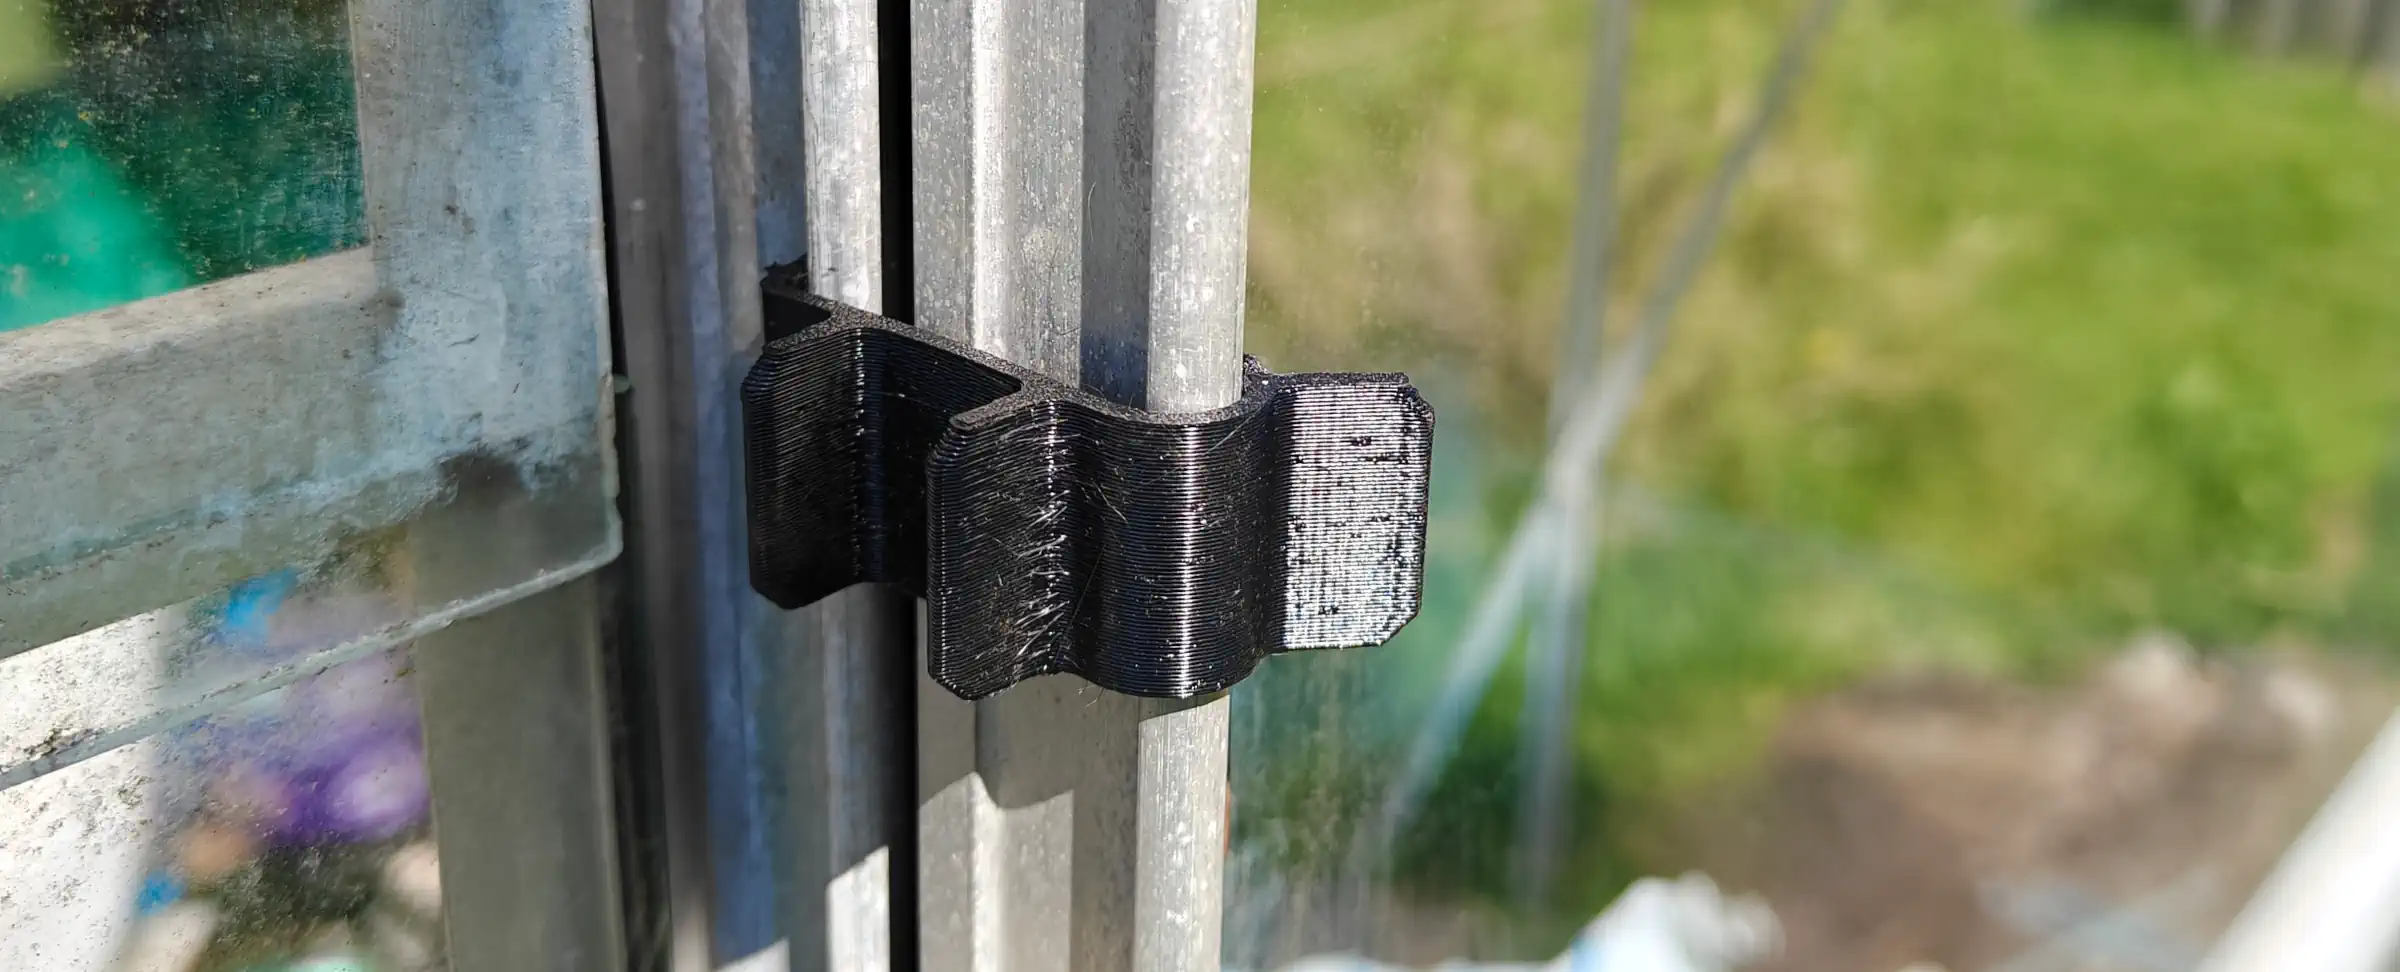
With one of these on each side, the door is very much fixed shut. Little sticky-out tabs make it easy to remove these when it’s time to open the door. The main downside of these is that they only work to keep the door fully shut; it can’t be partially open, which is where the next part comes into play.
Model and Print Details Here (Model E)
Door Stopper Rail Clamp
When you want to have the greenhouse door open somewhat, but still want it fixed in place to avoid wind sliding the door about, my latches above are no use, so I designed a clamp which fits onto the top sliding door rail:
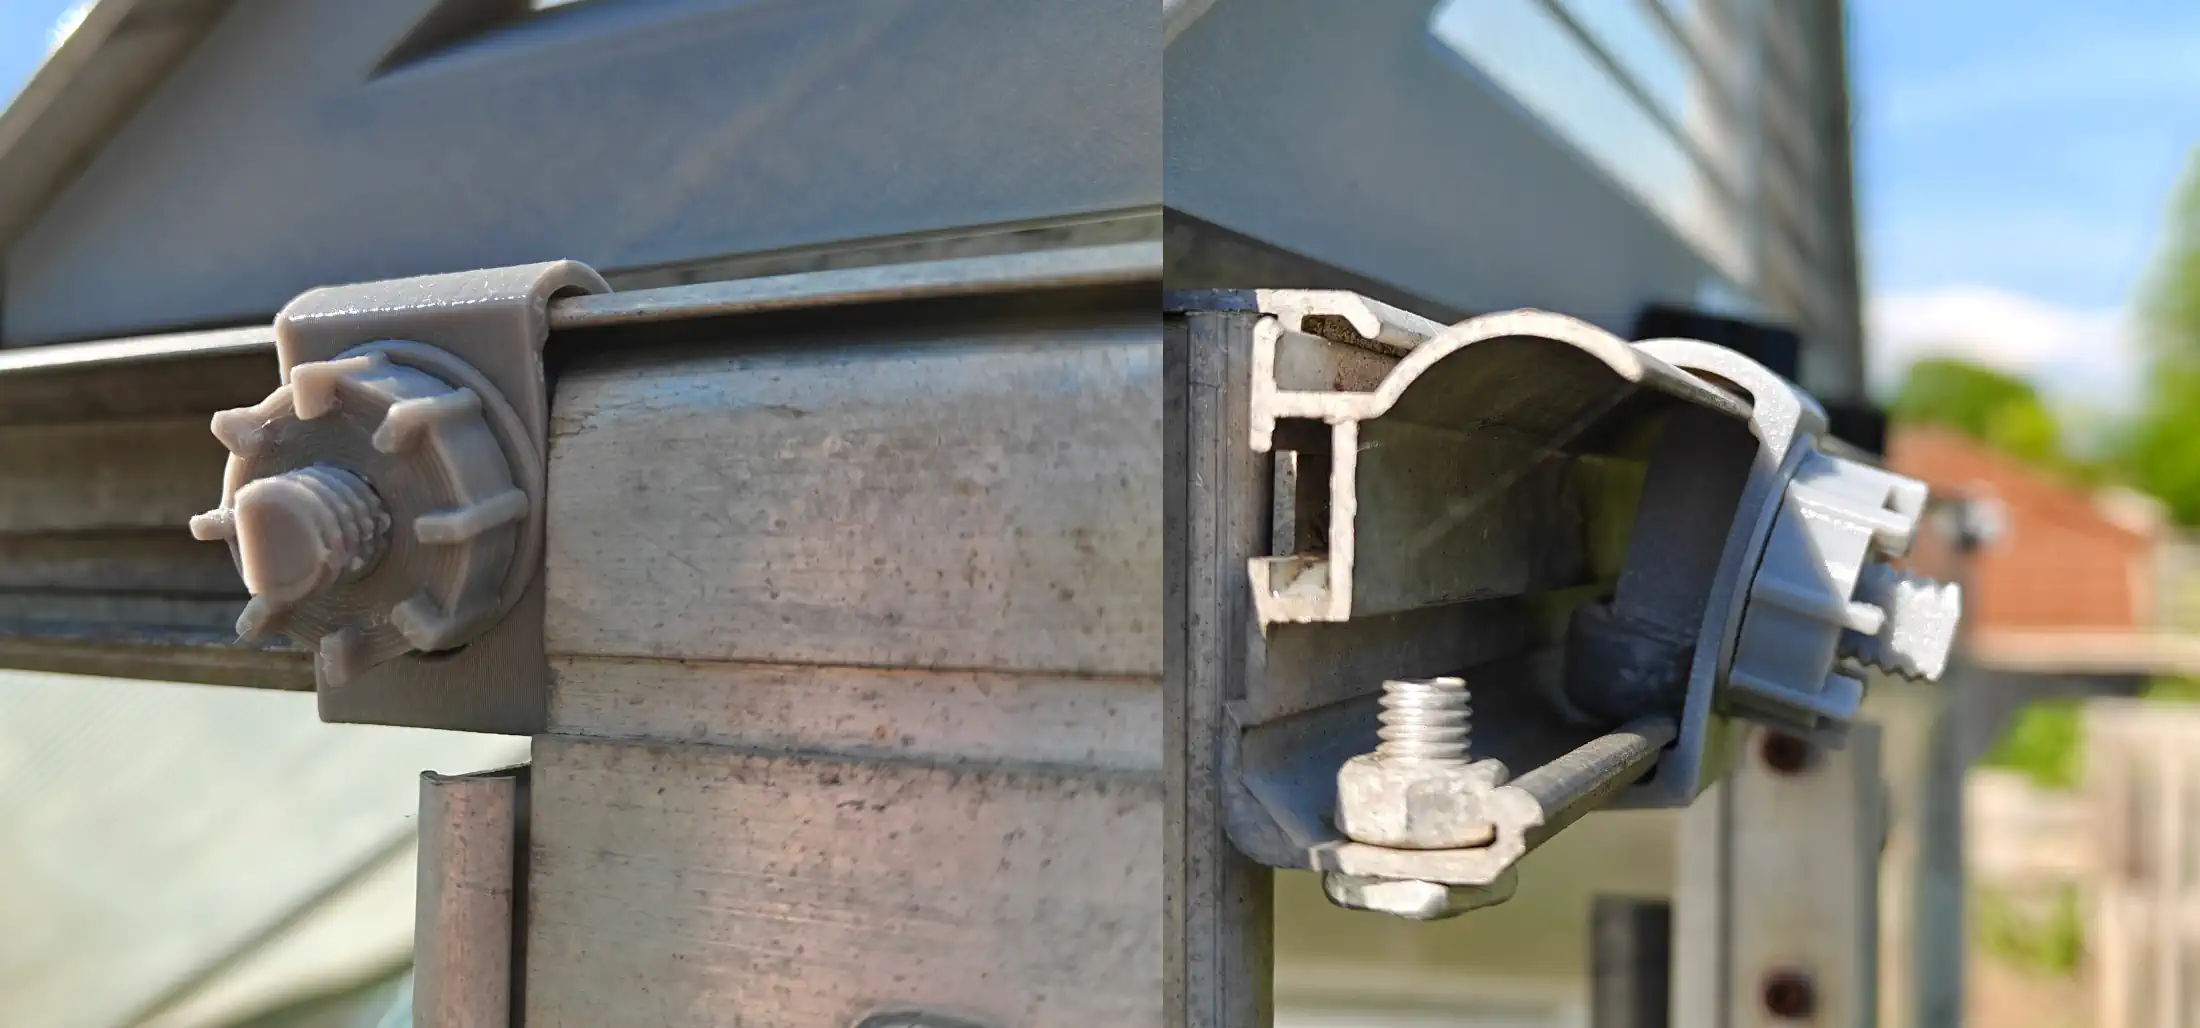
You’d insert these either side of the door, and screw them down to fix them in place, which will then keep the door in a fixed position.
These took many revisions to get right, mainly due to the more complex geometry of the top door rail, but I managed to come up with something which works well for my greenhouse.
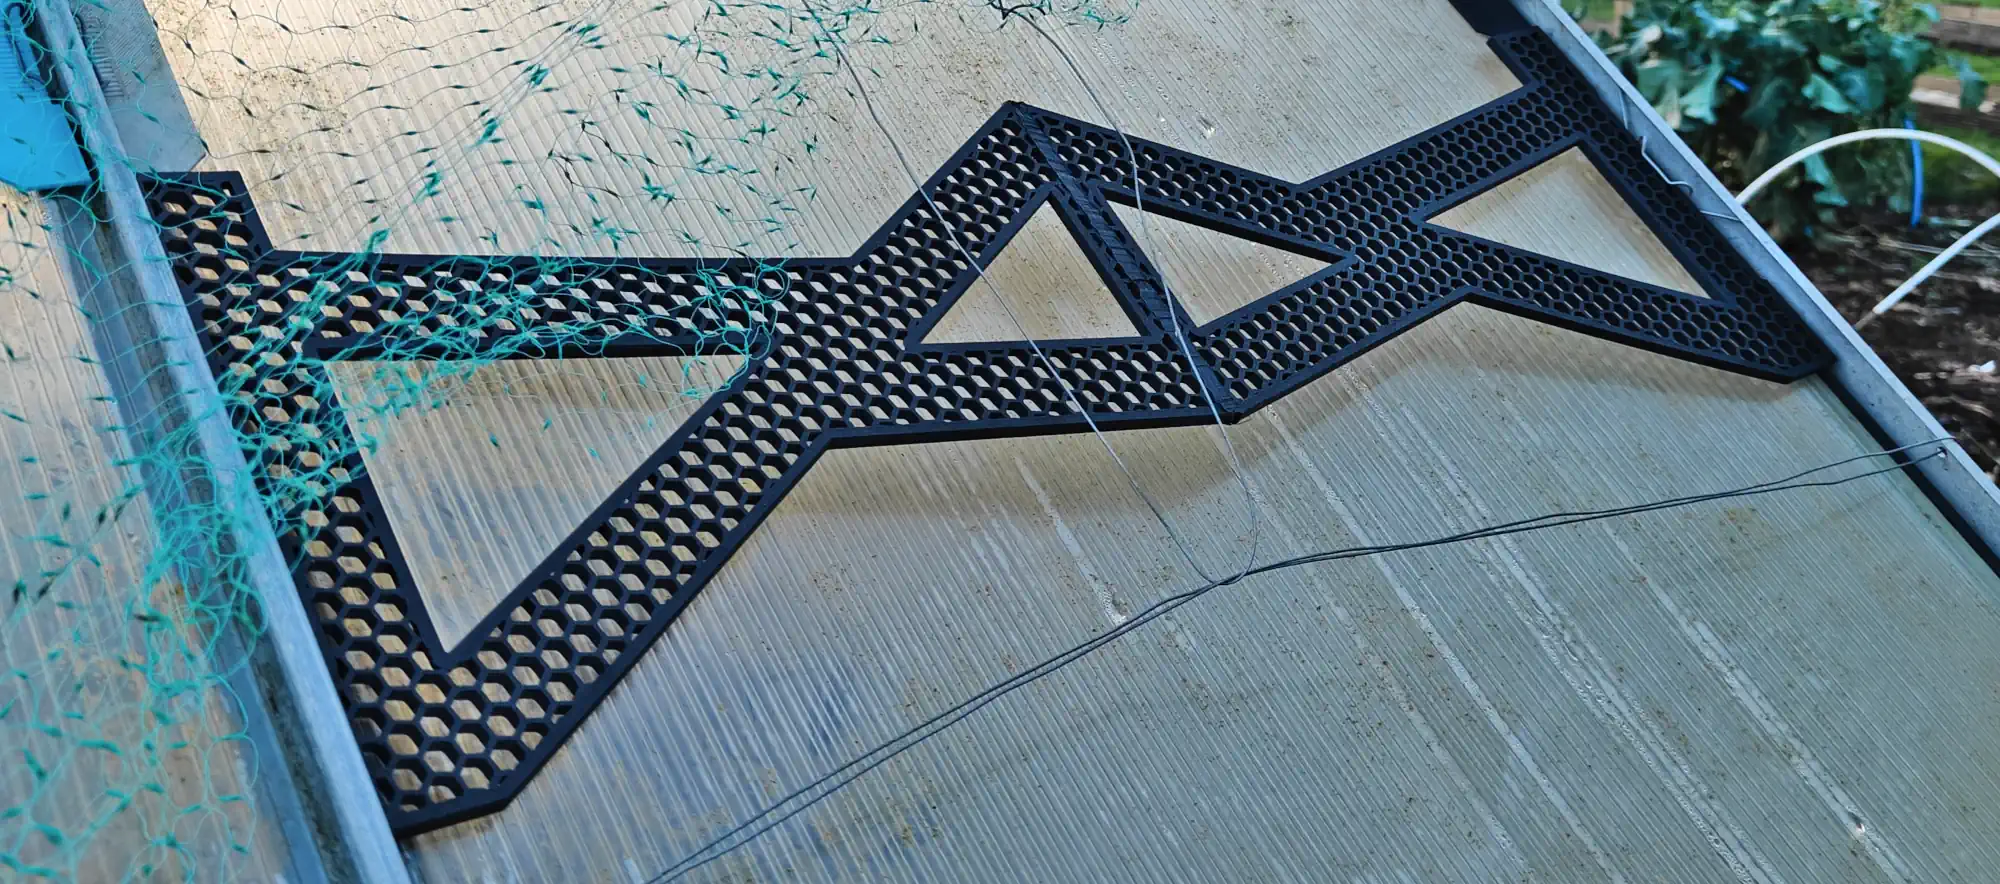
Triangular Vent Panel
I wanted to add a little extra ventilation to my greenhouse, to let out the heat on warm days, but I still wanted to defend against rain and wind. To achieve this, I designed a vent panel which could replace a top piece of glass above the door:
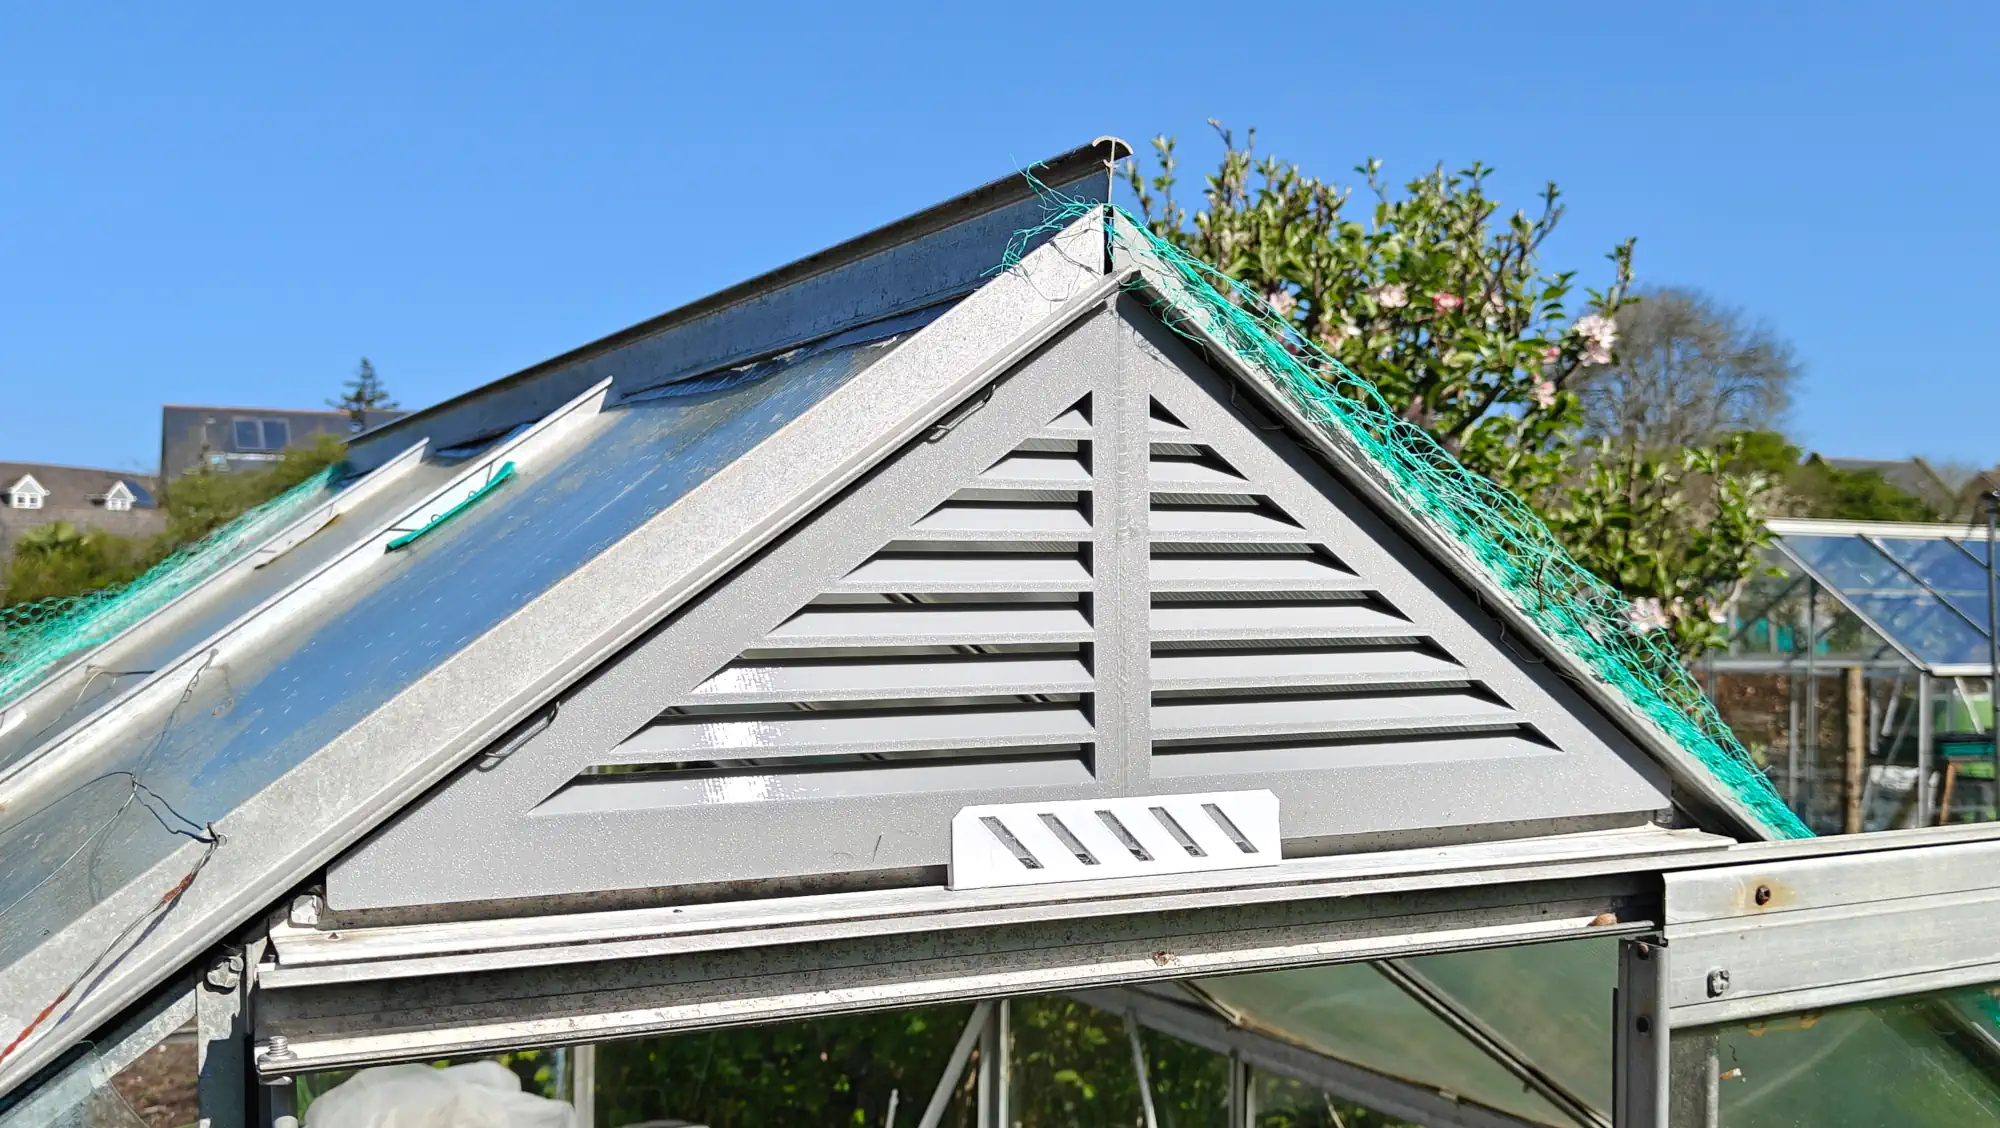
My sizing was a tad off at the bottom, being a little short (I designed to scale based on just a photo), but propping it up with another printed part worked well enough. This is held in place once again with standard W-clips. It’s another large print, so requires printing in two parts with “welding”, and each part may require a larger printer.